Tutorials
Table of Contents
Build R & Python environment on remote servers using jupyter notebook
This tutorial introduces how to run R and Python scripts using jupyter notebook on a remote server (such as our lab servers). Users can also try Rstudio-server as an alternative method, which requires be to installed and set by an IT Admin (needs root permission). This tutorial is for the scenario that the user does not have the root permission.
Install conda
The tutorial of installing conda can be found in another tutorial (Using Conda to manage R/Python environments and packages).
Install a R and Python environment using conda
- Create a new environment
For example, the environment is named r_env and uses a Python of version 3.9:
conda create -n r_env python=3.9
- Install R dependencies
An updated R version (>=4.0) is available through the conda-forge channel, so first add the channel.
conda config --add channels conda-forge
We are going to install R through conda-forge and not through the default channel, so we need to set its priority over the default channel.
conda config --set channel_priority strict
Next, we install the R environment:
conda install r-base
Within the above R environment, one usually conda install R packages using conda. For a R package available in cran, one needs to add r- before the regular package name:
conda install -c conda-forge r-{name_of_package}
For example, install Seurat using
conda install -c conda-forge r-seurat
For a R package available in bioconductor, one needs to use the bioconda channel and add bioconductor- before the regular package name:
conda install -c bioconda bioconductor-{name_of_package}
For example,
conda install -c bioconda bioconductor-deseq2Note, if the above installation methods do not work, one can run R in the terminal within the created environment and install R packages using
“install.packages(“R_PACKAGE_NAME”)” or “BiocManager::install(“R_PACKAGE_NAME”)”.
Install jupyter notebook and kernels for Python and R
Install jupyter notebook using pip:
pip install jupyterThen, install jupyter notebook kernels for Python and R using:
Pyton kernel:
pip install ipykernelThe above command will register the Python in the current environment to jypyter notebook. You can register other Python to the jupyter notebook using
python -m ipykernel install --user --name myenv --display-name "Python (myenv)"where
myenv is the conda environment name and Python (myenv) is the Python name showing in the jupyter notebook kernel list.
R kernel:
conda install -c conda-forge r-irkernelThen run R in the terminal and register the R kernel to jupyter notebook using the following R code.
IRkernel::installspec()
Run jupyter notebook
Change to the folder you'd like to save your notebook scripts. Then use the following command to run jupyter notebook in background, meaning jupyter notebook will be running even if you log off (close) the current terminal. This command uses the port 8887. You can use another port as long as it is not occupied. All the output information is directed to the program.log file in the current directory. You can check this file when debug your code.
nohup jupyter-notebook --no-browser --port 8887 > program.log 2>&1 &
Once you want to shut down the jupyter notebook, you can find the pid of the jupyter instance using the below command and uses kill PID to kill the process.
ps -ef|grep jupyter
Set up ssh tunnel to access the jupyter notebook on a local machine
If both the IP and the port of the jypyter notebook are open, you can access the jupyter notebook on a local machine using IP:port. For our servers, the IP is only open to our local network and the ports except a few specific ones (e.g., 22 for ssh) are blocked. We need to set up a ssh tunnel (port forwarding) to communicate with the port on the server.
ssh username@xx.xx.xx.xx -NL 8887:localhost:8887
The above command means any network request you send to port 8887 (you can also use another port) in your local machine will be automatically forwarded to xx.xx.xx.xx:8887 to the remote server (as shown by the figure below).
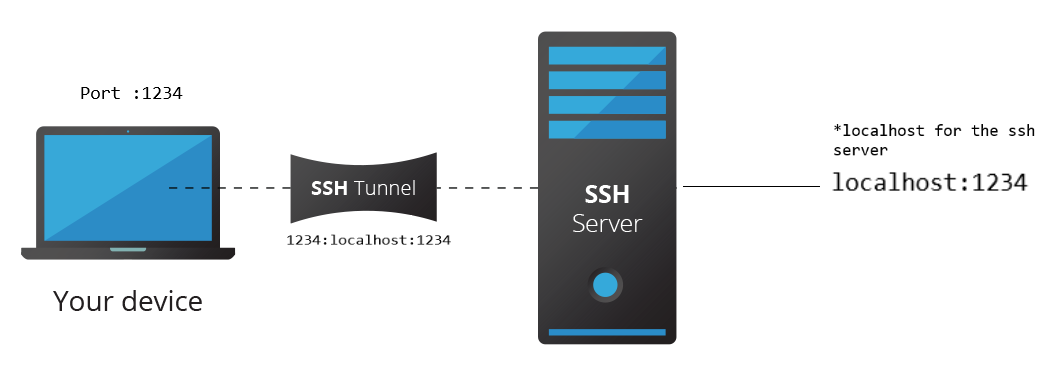
You can now login to the jupyter notebook on a local machine using the URL localhost:8887 on your browser.